Defining and Viewing BLOB Data in Oracle Application Express 3.1
Defining and Viewing BLOB Data in Oracle Application Express 3.1
Purpose
This tutorial shows you how to create a report and form that inserts and
views BLOB data in the database using Oracle Application Express 3.1.
Approximately 30 minutes
This tutorial covers the following topics:
| Overview | |
| Prerequisites | |
| Altering the Table to Add BLOB Data | |
| Creating a Form With a Report | |
| Viewing BLOB Data in a Form | |
| Viewing BLOB Data in a Report | |
| Summary | |
| Related Information |
Declarative BLOB support enable files to be
declaratively uploaded in forms, and downloaded or displayed using
reports. BLOB display and download can also be authored procedurally
using PL/SQL. For further information, click on help and search on BLOB.
To get more information about the 3.1 New Features, click here.
This tutorial shows you how to add BLOB data to your table and then use it in a report and form.
Prerequisites
Before you perform this tutorial, you should:
| 1. |
Install Oracle Database 9.2 or above.
| |
| 2. |
Download and Configure Oracle Application Express 3.1.
| |
| 3. |
Download the OEHR Sample Objects Packaged Application here and import it into your Oracle Application Express 3.1 instance.
| |
| 4. |
Download and unzip the blob.zip file which contains a script to modify the OEHR_EMPLOYEES with BLOB column information.
| |
| 5. |
To perform this tutorial, you need to perform the Building and Customizing an Interactive Report in Oracle Application Express 3.1 tutorial.
Alternatively, you can import the OBE New Features application as a
packaged application in Application Express. Download and unzip the apexnf.zip file and import the irrobe_packagedapp.sql packaged application file.
| |
Note: The application numbers and page numbers may differ slightly from the screenshots.
Altering the Table to Add BLOB Data
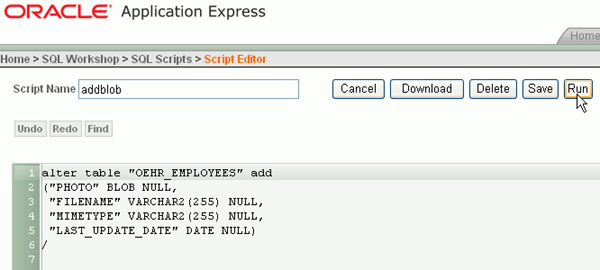
You need to add the BLOB column, PHOTO, as well as a column for
MIMETYPE, FILENAME and LAST_UPDATE_DATE in the OEHR_EMPLOYEES table.
Perform the following steps:
| 1. |
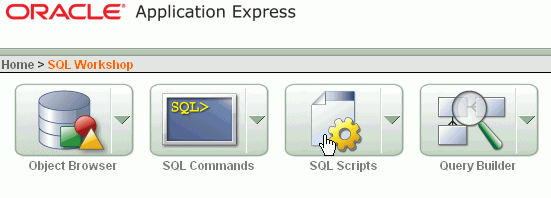
You first need to define the BLOB column in your table. In this case,
you will add a PHOTO column to the OEHR_EMPLOYEES table. In addition,
you will create a MIMETYPE, FILENAME and LAST_UPDATE_DATE column so that
you can store specific attributes about the photo and view it in
different ways. Navigate to SQL Workshop >SQL Script.
 | |
| 2. |
Click Upload.
 | |
| 3. |
Select the addblob.sql file
in the directory where you downloaded and unzipped the files from the
prerequisites. Enter a name in the name field and click Upload.
 | |
| 4. |
Select the uploaded file.
 | |
| 5. |
Click Run.
 | |
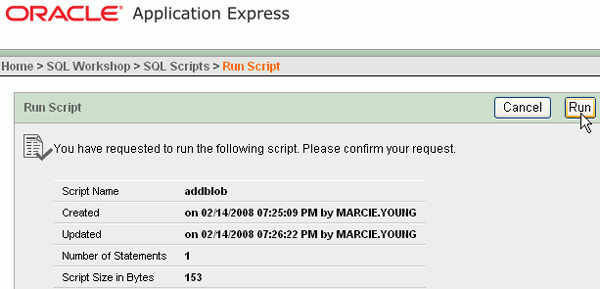
| 6. |
At the confirmation window, click Run.
 | |
| 7. |
Your script was submitted to be executed. Click the View Results icon.
 | |
| 8. |
The table was altered successfully and the PHOTO BLOB column, MIMETYPE, FILENAME and LAST_UPDATE_DATE. Click the Application Builder tab.
 | |
In order to load and view BLOB data, you need to create a form with a report. Perform the following steps:
| 1. |
Navigate to your New Features Application page. Click Create Page.
 | |
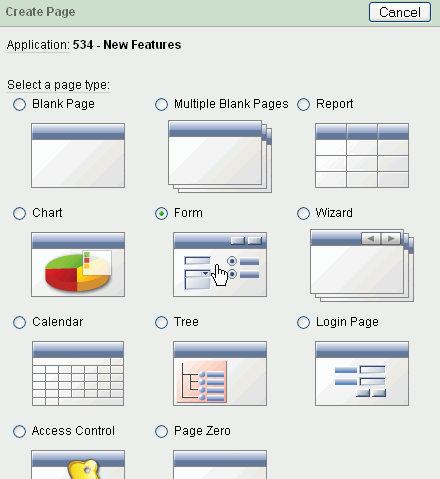
| 2. |
Click the Form page type.
 | |
| 3. |
Click Form on a Table with Report.
 | |
| 4. |
Click Next.
 | |
| 5. |
Select or enter the OEHR_EMPLOYEES table and click Next.
 | |
| 6. |
Select Classic for Implementation and enter Page Name and Region Title Maintain Employee Information and click Next.
 | |
| 7. |
Accept the default and Click Next.
 | |
| 8. |
For the report, you want to select FIRST_NAME, LAST_NAME, EMAIL and PHOTO from the list of columns and clickNext.
 | |
| 9. |
Accept the default and click Next.
 | |
| 10. |
Enter Maintain Employee Details for Page Name and Region Title and click Next.
 | |
| 11. |
Accept the default and click Next.
 | |
| 12. |
Accept the default and click Next.
 | |
| 13. |
Select all the columns except MIMETYPE, FILENAME and LAST_UPDATE_DATE and click Next. Note: The columns you did not include will automatically be populated when you add a PHOTO.
 | |
| 14. |
Accept the default and click Next.
 | |
| 15. |
Click Finish.
 | |
| 16. |
Click Run Page.
 | |
| 17. |
The report is displayed. Currently, there is no data in the Photo column
since you haven't uploaded any BLOB files yet. Click on the Edit icon
for an employee.
 | |
| 18. |
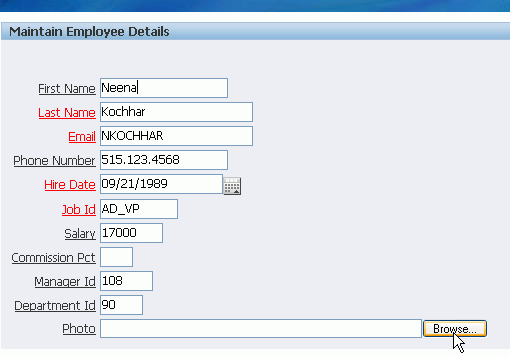
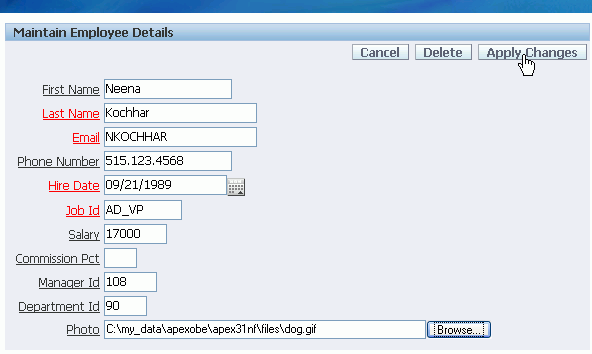
The form is displayed. You can add a photo. Click Browse... Select your file, in this case dog.gif and click Open.
 | |
| 19. |
Click Apply Changes.
 | |
| 20. |
Notice that the Report now has a Download link for the record you added the Photo to. Click the Download link.
 | |
| 21. |
The download link produces a window that allows you to download a file
but it doesn't say the name of the file or where it will be copied to.
In the next section, you examine how to specify the parameters
associated with the Photo column in a form and report.
 | |
You can change the way that the BLOB Data is displayed, either inline or as an attachment. Perform the following steps:
| 1. |
Click the View icon for the employee you added the photo previously.
 | |
| 2. |
Notice that you automatically see a download link. Click the Edit Page link in the developer toolbar.
 | |
| 3. |
Under Items, select the P<#>_PHOTO link.
 | |
| 4. |
Select the Source tab.
 | |
| 5. |
Click the BLOB Download Format Mask link.
 | |
| 6. |
In order for the information to be read from the database, enter MIMETYPE for MIMETYPE, FILENAME for FILENAME and LAST_UPDATE_DATE for BLOB Last Updated Column. Select Attachment for the Content Disposition and leave the default Download Link Text at Download and click Apply.
 | |
| 7. |
Notice how the Source Value or Expression has changed based on the input you just provided. Click Apply Changes.
 | |
| 8. |
Click Run Page.
 | |
| 9. |
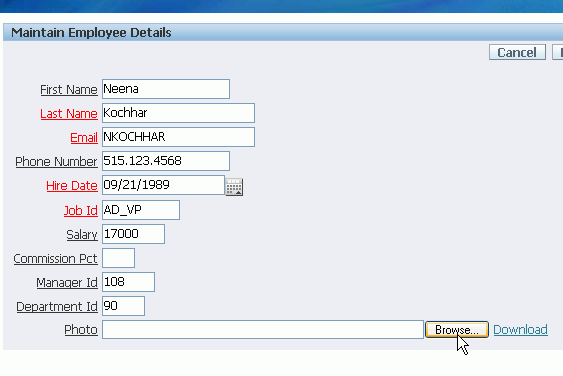
In order for the MIMETYPE, FILENAME and LAST_UPDATE_DATE to be populated in the database, you need to reupload the file. Click Browse... select the file, in this case dog.gif, and click Open.
 | |
| 10. |
Click Apply Changes.
 | |
| 11. |
Select the Edit icon next to row that contains the Download link.
 | |
| 12. |
Click the Download link.
 | |
| 13. |
Notice that the file name is now specified on the dialogue. It also is
opening the file as an attachment using a program identified from the
MIMETYPE. Click OK.
 | |
| 14. |
The file is open in a separate window. Close the window.
 | |
| 15. |
You will change the Content Disposition to see what happens when you select inline instead of attachment. ClickEdit Page.
 | |
| 16. |
Under Items, click P<#>_PHOTO.
 | |
| 17. |
Under Source, click the BLOB Download Format Mask link.
 | |
| 18. |
Change the Content Disposition to Inline and click Apply.
 | |
| 19. |
Click Apply Changes.
 | |
| 20. |
Click Run Page.
 | |
| 21. |
Click the Download link.
 | |
| 22. |
Notice now that the image is shown within the browser (inline). To return to the form, click the Back button in your browser.
 | |
| 23. |
In the next section, you make the necessary changes to display the image from within the report. Click Apply Changes.
 | |
In this section, you make the necessary changes to view a BLOB column in
different ways within a report. Perform the following steps:
| 1. |
Click the Edit Page link in the developer toolbar.
 | |
| 2. |
Under Regions, select the Report link.
 | |
| 3. |
Select the Edit icon in front of PHOTO.
 | |
| 4. |
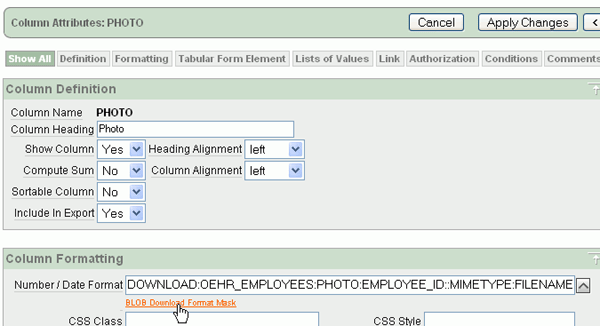
Under Column Formatting, notice that some of the parameters for the BLOB are already displayed. Select the BLOB Download Format Mask link.
 | |
| 5. |
Enter MIMETYPE for MIMETYPE, FILENAME for FILENAME and LAST_UPDATE_DATE for BLOB Last Updated Column. Notice that Content Disposition is set to Inline. Click Apply.
 | |
| 6. |
Click Apply Changes.
 | |
| 7. |
Click Run Page.
 | |
| 8. |
Select the Download link.
 | |
| 9. |
Notice that the image is displayed inline in the browser. Click the Back button
in your browser to return to the report. Note that the attachment
content disposition works the same as in the form so you will not
examine that option again.
 | |
| 10. |
Click Edit Page.
 | |
| 11. |
Under Regions, select the Report link.
 | |
| 12. |
Select the Edit icon for PHOTO.
 | |
| 13. |
Under Column Formatting, select the BLOB Download Format Mask link.
 | |
| 14. |
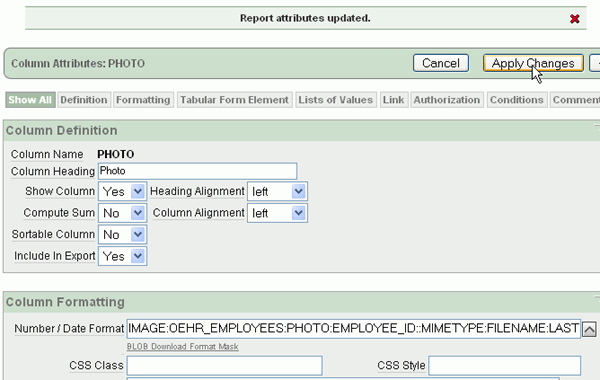
Change the Format Mask to IMAGE and click Apply.
 | |
| 15. |
Click Apply Changes.
 | |
| 16. |
Click Run Page.
 | |
| 17. |
Notice this time the image is inserted directly into the report itself.

Note: To modify the display attributes of the image (i.e. to make it
smaller), you need to use the programmic way of including images. See
the documentation at (http://download.oracle.com/docs/cd/E10513_01/doc/appdev.310/e10499/api.htm#CHDICGDA)
| |
Summary
In this tutorial, you learned how to:
| Alter a table to add BLOB data | ||
| Create a form with a report that contains the BLOB column | ||
| View BLOB data in a form and report | ||
No comments:
Post a Comment